Advanced Features
This section covers features and settings in SerialMailer that offer more control or cater to specific advanced use cases. While not essential for basic email sending, understanding these options can help you leverage the full power of the application.
Test Lists
Test lists are a crucial safety feature in SerialMailer that allow you to test your email campaigns on a small group of trusted recipients before sending to your entire audience. This helps you catch errors, verify formatting, and ensure your personalization works correctly.
Why Use Test Lists
Always test your emails before sending them to your main recipient list. Test lists help you:
Verify email formatting across different email clients
Check personalization fields to ensure they display correctly
Test attachments and links to make sure they work
Catch typos or errors before they reach your entire audience
Confirm delivery to different email providers (Gmail, Outlook, etc.)
Creating Test Lists
Test lists can be any of the lists stored in My Lists within the Recipient Lists window. To create a test list:
Open the Recipient Lists window (Window menu → Recipient Lists / Database Manager)
In the lower left corner of the window click the + button
Choose New Local List
Give your test list a descriptive name like “Test Recipients” or “Email Testing”
Add a few email addresses you control (your own email, colleagues, etc.)
Setting Up Test List Fields
For test lists to work properly with personalization, the field names (column headers) in your test list should match those in your main recipient list.
Example: If your main recipient list has fields named:
Email
First Name
Last Name
Company
Your test list should use the exact same field names:
Email
First Name
Last Name
Company
To edit field names in your test list:
Select your test list in My Lists
Select one of the columns in the list by clicking on the column header
Click the Options menu below the list
Choose Column Name to rename fields
Make sure the email field has the same name as in your main list
Using Test Lists When Sending
When you’re ready to send your email:
Click the Send button in your email document
In the Send window, look for the Send to menu
Instead of Recipients List, choose Test Recipients
Select your test list from the submenu
Click Send
The email will be sent only to the addresses in your selected test list, using the same message content and personalization as would be sent to your main list.
What Happens with Missing Fields
If your test list is missing fields that are used in your email:
Email sending will continue if the email address field exists
Missing personalization fields will appear blank in the final email
No error message appears - SerialMailer handles this gracefully
This means you can test with simplified test lists, but it’s better to include all fields for complete testing.
Custom Headers
Email messages contain headers that control various aspects of how the message is delivered and processed. SerialMailer allows you to add custom headers to your messages, which can be useful for specialized email marketing, tracking, or integration with other systems.
To add custom headers to your email message, select Custom Headers from the Format menu in the message editor. This will open a window where you can manage your custom headers.
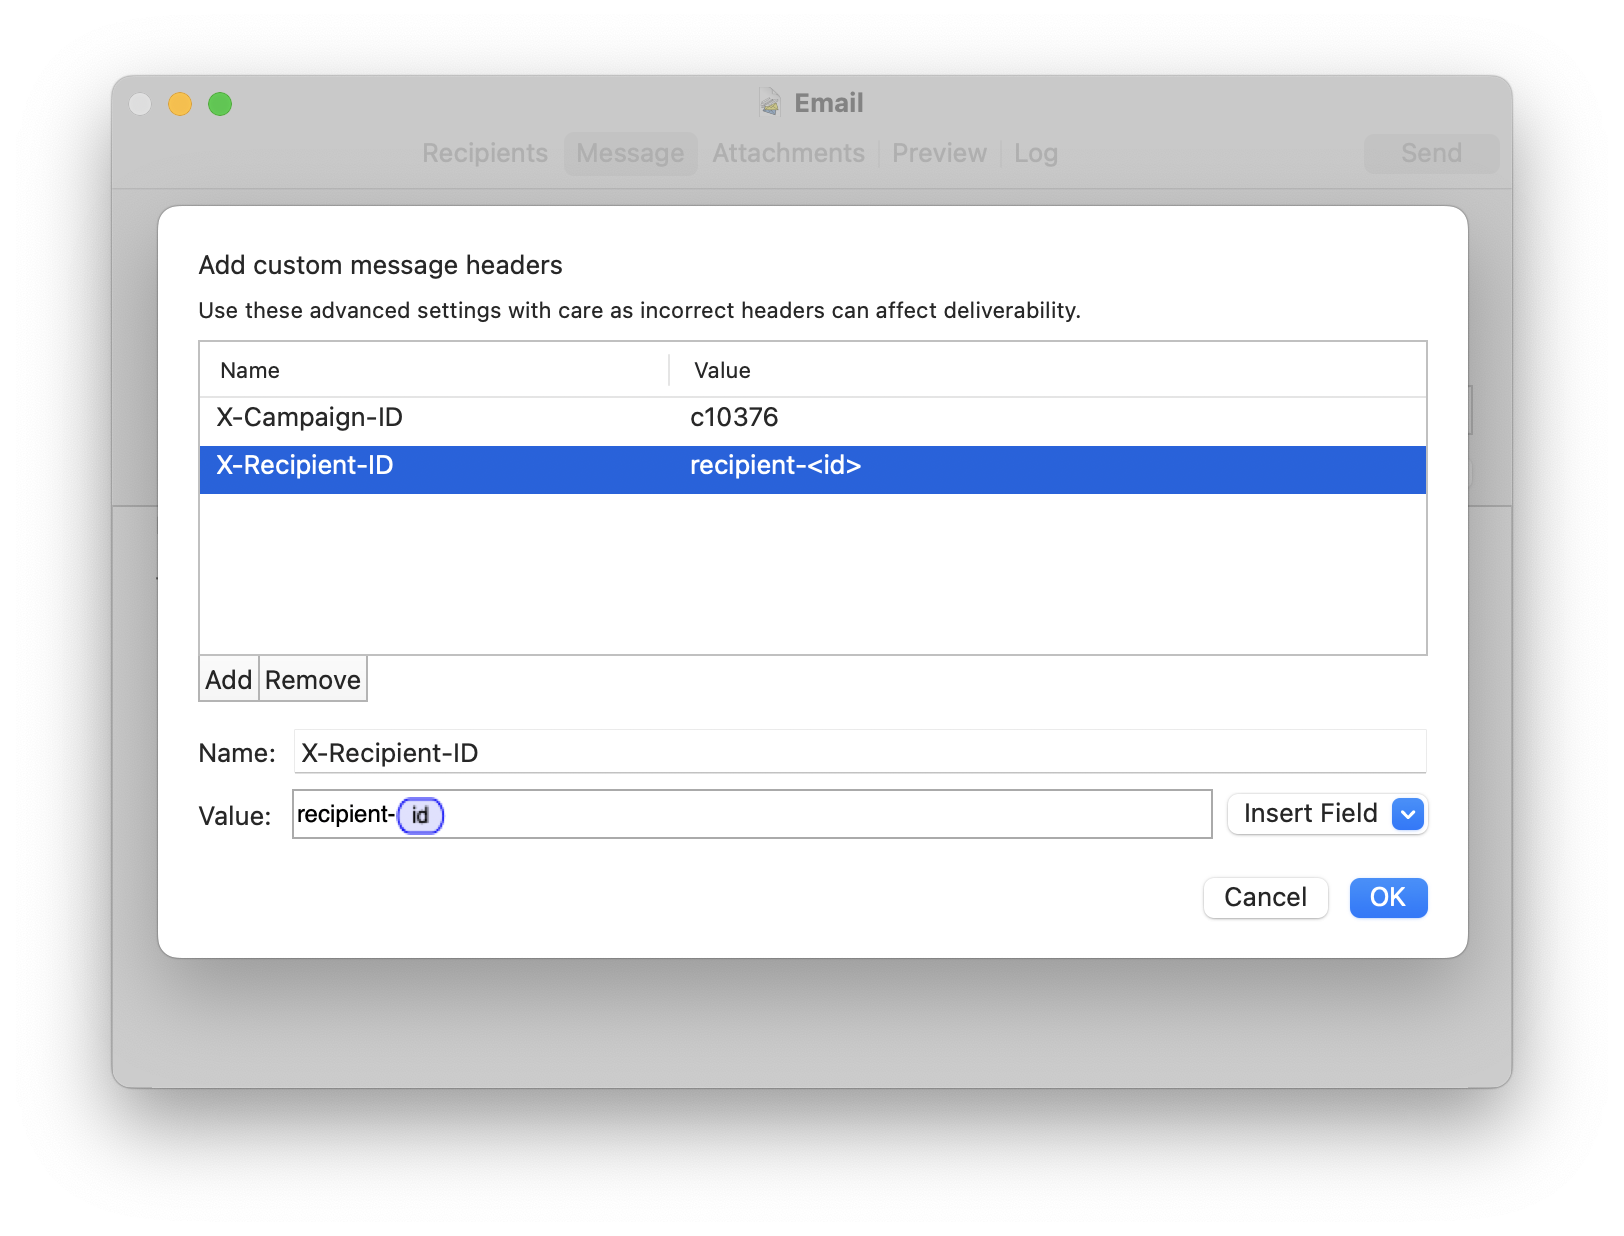
In this window you can:
View a list of all custom headers that will be added to your message
Add new headers by specifying a name and value
Remove existing headers by selecting them and clicking the Remove button
Edit header names and values by selecting them in the table
For each header, you need to provide:
Name: The header field name (for example, “X-Campaign-ID” or “List-Unsubscribe”)
Value: The content of the header field
You can personalize header values by inserting fields from your recipient list. To do this, click on the Insert Field menu while editing a header value and select the field you want to include. This allows you to create dynamic headers that change for each recipient, similar to how you can personalize the email body.
Note
Custom headers are powerful but should be used with care. Incorrect headers can affect email deliverability or cause your messages to be flagged as spam. If you’re unfamiliar with email headers, research them carefully before adding custom ones to your messages.
Common uses for custom headers include:
Setting up tracking identifiers for email analytics platforms
Adding List-Unsubscribe headers for improved deliverability
Adding X-headers for custom metadata or integration with other systems
When you’re done configuring your custom headers, click OK to save them with your message.